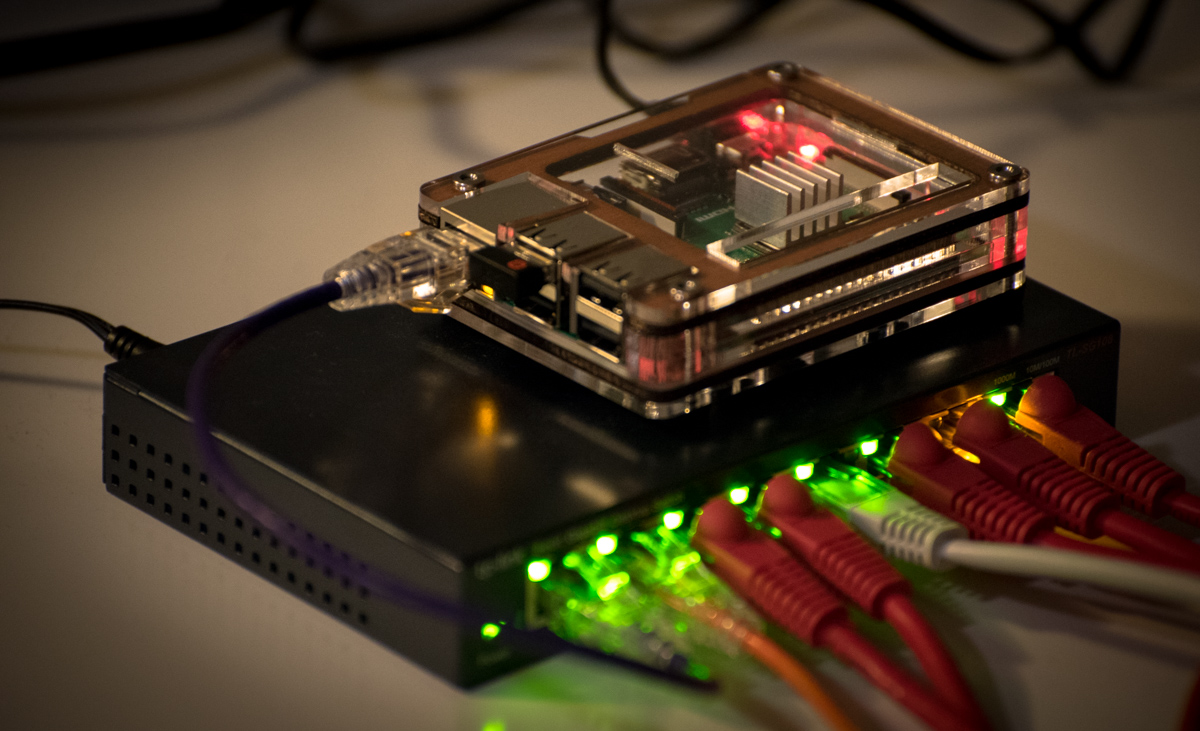
As I’ve mentioned in previous posts, I’m working on build a Kubernetes cluster out of Raspberry Pis. One of my design goals for the cluster is for it to be modular and separate from my home WiFi network.
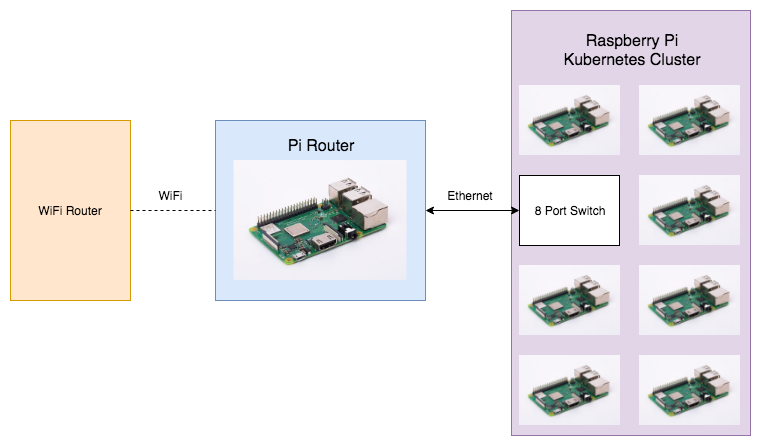
To do this, I’ve decided to take one of the Pis and make it into a jumpbox for accessing the cluster and a router that grants the cluster Pis access to the internet. Plan is for it to look somewhat like the diagram below, with the Pi Router connected to my regular home router over WiFi and connected to the Pi Cluster’s 8-port switch over ethernet.

I tried following other guides on the internet (particularly ones trying to do the opposite and configure wlan0 to be a wireless access point) and had some issues. Turns out things change in Raspbian and some configuration options are no longer valid. So my goal with this post is to be less of an exact “step by step” guide and more of a trail of breadcrumbs to provide some general guidance – and help me remember what I did when this Pi inevitably dies.
Equipment
I assume if you’ve stumbled upon this post that you probably have all the equipment that you need, but I figured it wouldn’t hurt to mention the relevant equipment I used.
- Raspberry Pi 3 Model B+
- C4 Labs “Zebra” Wood Case
- TP-Link 8-port Gigabit Unmanaged Switch
- Silicon Power 32GB Class 10 microSD card (budget-friendly and fast, time will tell if reliable)
- Monoprice SlimRun Cat6 Ethernet Cables (I really like these)
- Miscellaneous other Cat5 and Cat6 ethernet cables
The gigabit switch is probably overkill for this project since the Pis can’t network nearly that fast – could have also done with Cat5 cable all around – but the reviews were good and the prices were right. So now that that’s out of the way, let’s get in to how I transformed this Raspberry Pi and pile of cables into a functioning router for my Pi Kubernetes cluster.
Install Raspbian Linux
You can download the latest version of Raspbian stretch here. I ended up installing full Raspbian on the Pi Router and Raspbian Lite on all of the other clustered Pis. The full Raspbian includes a graphical desktop environment which certainly came in handy for recovery when I broke my dhcpcd service and wlan0 interface. 😉
These are the versions of the important bits involved:
pi@porter:~ $ lsb_release -a
No LSB modules are available.
Distributor ID: Raspbian
Description:  Raspbian GNU/Linux 9.4 (stretch)
Release:  9.4
Codename: stretch

pi@porter:~ $ uname -a
Linux porter 4.14.50-v7+ #1122 SMP Tue Jun 19 12:26:26 BST 2018 armv7l GNU/Linux

pi@porter:~ $ dnsmasq -v
Dnsmasq version 2.76

pi@porter:~ $ dhcpcd --version
dhcpcd 6.11.5
I used etcher.io to burn the image to my microSD card and added a ssh file to the root directory of the card to enable ssh with the pi user.
After installing, I used plugged the Pi into my TV and used the GUI to connect it to my home WiFi network. I then changed the hostname to be on theme and pi user’s password to be a little more secure.
Static IP for Pi Router on Home Network
Since I’ll be using this as a jumpbox, I needed a static IP address for it on my home network. I did the following:
- Looked up the MAC address for the
wlan0network device.
$ ifconfig wlan0
- Logged in to my home router’s admin portal (for me this was at
192.168.1.1) and reserved a static IP address for this MAC address. For my NETGEAR router I followed these instructions and assigned it192.168.1.100.
Configure Ethernet Interface on Pi Router
Now that the Pi Router was connected to my home network, I was able to ssh on to it at the address I gave it.
ssh pi@192.168.1.100
So I initially followed a guide that instructed me to configure a static IP address for eth0 in /etc/network/interfaces and this ended up breaking my dhcpcd daemon. It failed with errors like this:
Job for dhcpcd.service failed because the control process exited with error code.
See "systemctl status dhcpcd.service" and "journalctl -xe" for details.
This meant my wlan0 connection was down and I could no longer ssh in to the Pi. Luckily, I had installed the desktop environment and was able to salvage things. So I did some digging and found these two posts on the Raspberry Pi forums:
- Rapsberry Pi Forums: Configuring dhcpcd in Raspbian Stretch
- Rapsberry Pi Forums: problems with stretch static ip dhcpcd
They mainly were concerned with the wlan0 wireless access point use case, but I adapted the information in them for our situation. The secret was to add the following to our /etc/dhcpcd.conf file. This file configures our dhcp client daemon (more info here). If you’re interested in even more information about dhcpcd.conf, I recommend reading these Ubuntu docs.
So I added the following to the bottom of the dhcpcd.conf file:
sudo vim /etc/dhcpcd.conf
interface eth0
static ip_address=10.0.0.1/8
static domain_name_servers=8.8.8.8,8.8.4.4
nolink
This told it to give the eth0 interface a static IP address of 10.0.0.1/8 on the internal 10.0.0.0 network which the Pis in the Kubernetes cluster will be on. I also added the nolink option to get it to set up the interface without it necessarily being attached to the cluster.
Install dnsmasq
Next we’ll install dnsmasq to be our DNS/DHCP server for the cluster.
# Install dnsmasq
sudo apt install dnsmasq

# Move it's default config file for safe-keeping
sudo mv /etc/dnsmasq.conf /etc/dnsmasq.conf.old
I found this sample config file to be very helpful in explaining the options available. This is how I ended up configuring mine:
# Make a new configuration file for dnsmasq
sudo vim /etc/dnsmasq.conf
# Our DHCP service will be providing addresses over our eth0 adapter
interface=eth0

# We will listen on the static IP address we declared earlier
listen-address=10.0.0.1

# My cluster doesn't have that many Pis, but since we'll be using this as
# a jumpbox it is nice to give some wiggle-room.
# We also declare here that the IP addresses we lease out will be valid for
# 12 hours
dhcp-range=10.0.0.32,10.0.0.128,12h

# Decided to assign static IPs to the kube cluster members
# This would make it easier for tunneling, certs, etc.
dhcp-host=b8:27:eb:00:00:01,10.0.0.50
dhcp-host=b8:27:eb:00:00:02,10.0.0.51
dhcp-host=b8:27:eb:00:00:03,10.0.0.52
dhcp-host=b8:27:eb:00:00:04,10.0.0.53
dhcp-host=b8:27:eb:00:00:05,10.0.0.54
dhcp-host=b8:27:eb:00:00:06,10.0.0.55
dhcp-host=b8:27:eb:00:00:07,10.0.0.56

# This is where you declare any name-servers. We'll just use Google's
server=8.8.8.8
server=8.8.4.4

# Bind dnsmasq to the interfaces it is listening on (eth0)
bind-interfaces

# Never forward plain names (without a dot or domain part)
domain-needed

# Never forward addresses in the non-routed address spaces.
bogus-priv

# Use the hosts file on this machine
expand-hosts

# Useful for debugging issues
# log-queries
# log-dhcp
So I intially had issues with getting dnsmasq to boot up so I found the log-queries and log-dhcp options helpful. They log out to /var/log/syslog by default on Raspbian, but you’ll want to disable them once you get everything working to put less stress on the SD card.
I had some issues getting dnsmasq to successfully bind to my eth0 address on boot. Turns out there’s a bit of a race-condition where it will start up before dhcpcd has finished getting eth0 ready and fail with an error like this:
-- Unit dnsmasq.service has begun starting up.
Jul 01 21:20:56 porter dnsmasq[1289]: dnsmasq: syntax check OK.
Jul 01 21:20:56 porter dnsmasq[1292]: dnsmasq: failed to create listening socket for 192.168.2.1: Cannot assign requested address
Jul 01 21:20:56 porter dnsmasq[1292]: failed to create listening socket for 10.0.0.1: Cannot assign requested address
Jul 01 21:20:56 porter dnsmasq[1292]: FAILED to start up
Jul 01 21:20:56 porter systemd[1]: dnsmasq.service: Control process exited, code=exited status=2
Jul 01 21:20:56 porter systemd[1]: Failed to start dnsmasq - A lightweight DHCP and caching DNS server.
I ended up drawing inspiration from this Raspberry Pi Forum post and edited the initialization script for dnsmasq to make it wait a bit for dhcpcd. Not sure if this is the best way of doing it (doubtful), but other alternative suggestions didn’t work for me. So I modified the beginning of /etc/init.d/dnsmasq to look like this:
sudo vim /etc/init.d/dnsmasq
#!/bin/sh

# Hack to wait until dhcpcd is ready
sleep 10

### BEGIN INIT INFO
# Provides:       dnsmasq
# Required-Start: $network $remote_fs $syslog $dhcpcd
# Required-Stop:  $network $remote_fs $syslog
# Default-Start:  2 3 4 5
# Default-Stop:   0 1 6
# Description:    DHCP and DNS server
### END INIT INFO
Notable changes to /etc/init.d/dnsmasq above were the hacky sleep 10 and the addition of $dhcpcd to the “Required-Start” section.
After all of this, it’s time to try rebooting the Pi:
sudo reboot
ssh pi@192.168.1.100
If everything went as planned, you should be able to validate that dnsmasq is running by doing:
sudo service dnsmasq status
Forward Internet from WiFi (wlan0) to Ethernet (eth0)
I wanted the Pis in my cluster to be able to access the outside internet, so the next step was to set up some internet forwarding!
First edit /etc/sysctl.conf and uncomment the following line:
sudo vim /etc/sysctl.conf
net.ipv4.ip_forward=1
I then added the following iptables rules:
sudo iptables -t nat -A POSTROUTING -o wlan0 -j MASQUERADE
sudo iptables -A FORWARD -i wlan0 -o eth0 -m state --state RELATED,ESTABLISHED -j ACCEPT
sudo iptables -A FORWARD -i eth0 -o wlan0 -j ACCEPT
After all this, my iptables rules looked like the following:
sudo iptables -L -n -v

Chain INPUT (policy ACCEPT 1780 packets, 164K bytes)
 pkts bytes target     prot opt in     out     source               destination

Chain FORWARD (policy ACCEPT 0 packets, 0 bytes)
 pkts bytes target     prot opt in     out     source               destination
   20  1520 ACCEPT     all  --  wlan0  eth0    0.0.0.0/0            0.0.0.0/0            state RELATED,ESTABLISHED
   20  1520 ACCEPT     all  --  eth0   wlan0   0.0.0.0/0            0.0.0.0/0

Chain OUTPUT (policy ACCEPT 871 packets, 104K bytes)
 pkts bytes target     prot opt in     out     source               destination
I wanted to make sure these rules survived across reboots, so I installed a package called iptables-persistent:
sudo apt install iptables-persistent
As part of the installation process it asked me if I wanted to save the current rules to /etc/iptables/rules.v4 and I said “of course!”
After all of this I did a sudo reboot again and sshed in again.
Testing It All Out
After all of this, I plugged the Pi Router into the switch with all of my clustered Pis. I turned the switch on and off again to force them all to try and reacquire a new DHCP lease and then ran the following on the Pi Router to see if any DHCP leases were granted:
cat /var/lib/misc/dnsmasq.leases
Yep, they were all there! Since I added expand-hosts to the dnsmasq.conf configuration, I was able to ssh on to them by hostname like this:
ssh pi@blathers
I executed a few curl commands (e.g. curl http://example.com) to confirm that they had internet access and everything worked wonderfully! Additionally, from within blathers I was able to ssh pi@nook to confirm that the clustered Pis could communicate with each other.
What Didn’t Work
As I mentioned earlier, the editing /etc/network/interfaces did not work at all for me. My understanding is that it used to work in older versions of Raspbian, but no longer works correctly in Raspbian stretch.
Additionally, I had trouble around dnsmasq coming up before 10.0.0.1 was available for it to bind to. Adding a sleep to its init script “fixed” this, but it feels hacky. Still on the hunt for a better solution here.
Concluding Remarks
Like I mentioned earlier, these steps worked for me for my particular version of Raspbian stretch and hardware configuration. As I personally found from past guides, these steps may not continue to work. The gist of things should remain the same, however, so with some skilled Binging I’m sure you’ll get your Pi router working as well. Best of luck!